You’ve just found a gold chain in a drawer, inherited a ring from a relative, or spotted a “bargain” bracelet online. The big question is obvious: is it real? Knowing how to test gold at home can save you from overpaying for a fake, or from underselling a genuine piece.
The good news is that you don’t need a lab. A few simple checks, such as reading hallmarks, using a magnet, measuring density and running a scratch or acid test, can quickly reveal if an item is likely solid gold, gold-plated or something else entirely. The catch is that no single method is foolproof, and some can damage delicate pieces.
In this guide, you’ll learn each test step by step, how accurate it is, which myths to ignore, and when it’s worth paying a professional. Let’s start with what makes gold real in the first place.
What Makes Gold Real? Understanding Karats and Purity
Before testing anything, it helps to know what you’re looking for. Pure gold is 24 karat (24K), meaning all 24 parts are gold. Because pure gold is very soft, jewelers usually blend it with metals such as copper, silver, nickel or zinc. The karat number tells you how many of those 24 parts are actually gold.
| Karat | Gold content | Common stamp |
| 24K | 99.9% | 999 |
| 22K | 91.6% | 916 |
| 18K | 75% | 750 |
| 14K | 58.3% | 585 |
| 10K | 41.7% | 417 |
That means “real gold” doesn’t have to be pure. A 14K ring is genuine gold, just alloyed. The alloy mix also creates color: copper gives rose gold, while white gold combines gold with metals like palladium or nickel and is often rhodium-plated.
It’s also important to separate solid gold from items that only look like it:
- Solid gold: a gold alloy throughout the piece.
- Gold-filled: a thick layer of gold bonded to a base metal core, far more durable than plating.
- Gold-plated: a very thin gold coating over base metal that can wear off within months or years.
- Vermeil: gold plating over sterling silver.
Watch for these common lookalikes too: brass, copper, pyrite (“fool’s gold”) and tungsten, which nearly matches gold’s density and is sometimes used in counterfeit bars.
Why does this matter? Every test in this guide measures a physical property, such as magnetism, density or chemical reaction, and those readings shift depending on karat and construction. A 10K piece will weigh less than an 18K piece of the same size.
Before You Test: Preparation and Safety
A little preparation makes every test more reliable and protects both you and the item.
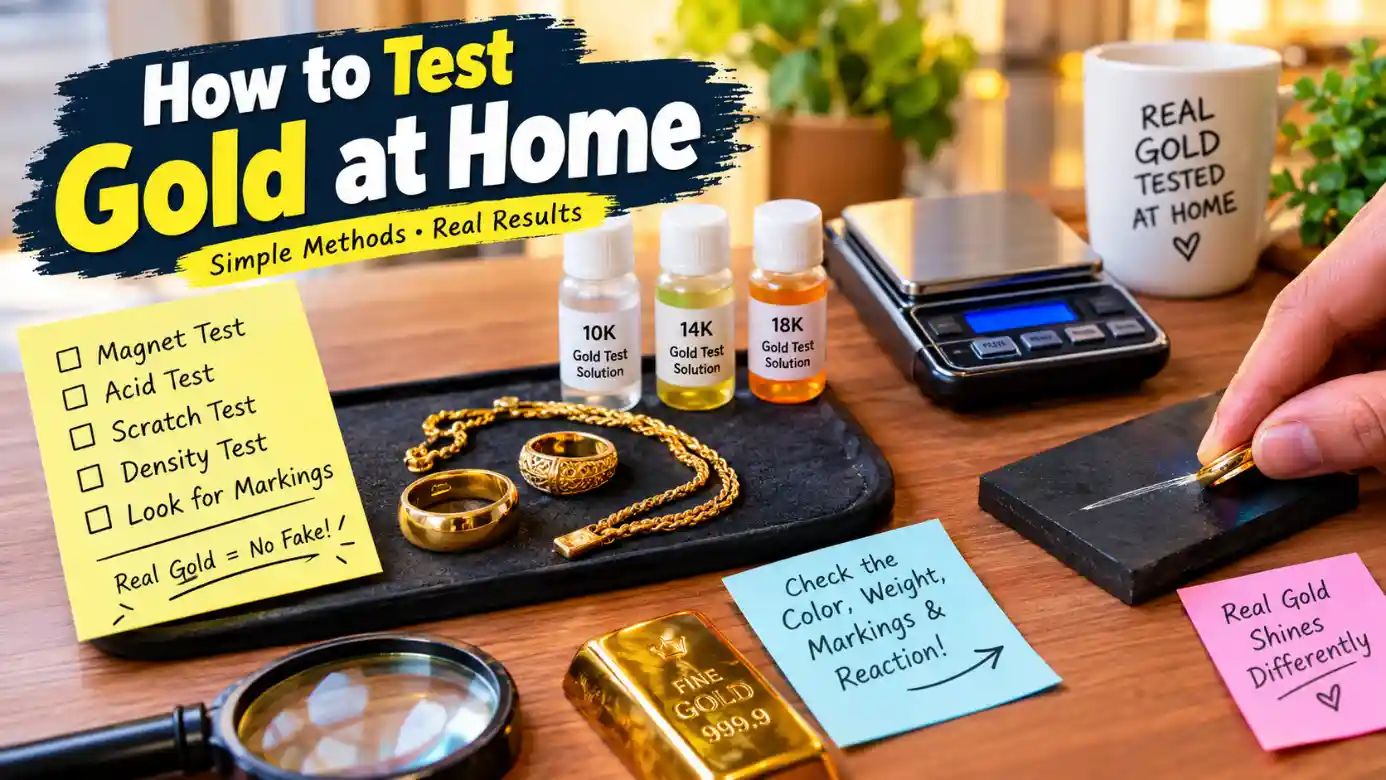
Gather your tools. You don’t need much:
- A 10x jeweler’s loupe for reading tiny stamps
- A strong magnet (neodymium works well)
- A digital scale accurate to 0.01 gram
- A glass or graduated cylinder for measuring water displacement
- An unglazed ceramic tile for scratch tests
- A gold acid testing kit, if you plan to use one
Prepare the item. Clean it gently with mild soap and warm water, then dry it completely. Dirt, oils or polish residue can hide stamps and skew results. Work under bright, natural-looking light on a soft cloth so nothing gets scratched or lost.
Document first. Photograph the piece from every angle, note any visible stamps, and record its weight before you start. If you later sell it or seek a professional opinion, this record is useful.
Stay safe. Acid tests involve corrosive chemicals. Wear gloves and eye protection, work in a well-ventilated area, and keep everything away from children and pets. Test over a tray to catch drips, and keep running water nearby in case of spills. Follow the kit’s instructions exactly and dispose of used materials as directed.
Know what could go wrong. Scratch and acid tests leave tiny marks. Don’t use them on antiques, signed designer pieces, heirlooms or anything you’re unsure about. Start with non-destructive methods, and only escalate if you need to.
Finally, treat results as clues, not verdicts. Combine several tests before drawing conclusions.
Non-Destructive Tests: Start Here (Part 1)
Non-destructive tests won’t harm your piece, so always begin with these.
1. Check the hallmark
Look inside rings, on clasps and near the ends of chains. Use your loupe to find stamps. Karat marks include 10K, 14K, 18K and 24K, while numeric marks (417, 585, 750, 916, 999) show purity as parts per thousand. Also look for a maker’s mark. In some countries, official hallmarks include assay office symbols and dates, which add credibility.
Be careful: marks like GP, GF, HGE, RGP or “1/20 12K GF” mean gold-plated or gold-filled, not solid gold. A stamp is a clue, not proof, since fakes can be stamped too.
2. Inspect visually
Examine the piece under bright light. Warning signs include:
- Worn patches showing a silvery or reddish metal underneath
- Flaking, bubbling or peeling color
- Green or black residue around edges or clasps
- Mismatched color between parts, such as a chain and its clasp
Solid gold won’t peel or flake, though low-karat alloys can tarnish slightly.
3. Try the magnet test
Hold a strong magnet close to the item. Gold isn’t magnetic, so if the piece clearly sticks or is pulled toward the magnet, it isn’t solid gold. But passing proves little: brass, copper, aluminum and silver aren’t magnetic either.
For a more sensitive check, hang the piece from a thread and bring the magnet close; even a slight swing is a warning sign. Test clasps and springs separately, since they sometimes contain steel even on genuine pieces. Use the magnet as a quick filter, not a final answer.
Non-Destructive Tests: Start Here (Part 2)
These next four checks add more evidence without damaging the piece.
4. Check weight and size
Weight and dimensions are especially useful for coins and bars. Weigh the item on a digital scale, then measure its diameter and thickness with calipers. Compare the numbers with the mint’s official specifications. Genuine pieces match closely, so even small deviations deserve suspicion. Because gold is so dense, a fake made of lighter metal often ends up too thick or too large for its weight.
5. Try the skin test
Press the item against clean, dry skin or wear it for a while. A dark or greenish mark can hint at base metals. However, sweat, lotions and skin chemistry all affect the result, and some genuine low-karat pieces leave marks too. Treat this test as a curiosity, not evidence.
6. Listen for the ping
For coins, listen for the ping. Balance the coin on your fingertip and tap the edge gently with a wooden pencil. Genuine gold usually produces a clear, high-pitched ring that lingers, while base metals sound dull. Sound varies by design and thickness, so compare with a known genuine coin, and never tap valuable collectibles.
7. Consider an electronic tester
Electronic testers measure electrical conductivity to help identify metals. Prices range from budget handhelds to professional units costing hundreds of dollars. Many read only the surface, so thick plating can fool them. Calibrate the device as instructed and test several spots on the item.
No single non-destructive test proves authenticity, but together they can quickly filter out obvious fakes. If your piece passes everything so far, you’re ready for the more precise density test.
The Density Test: Weighing Gold Against Water
Density is one of the most reliable tests you can do at home, because every gold alloy has a characteristic density. Pure gold measures about 19.3 g/cm³. Alloys are lighter: 22K is roughly 17.7, 18K about 15.2 to 15.9, 14K about 12.9 to 14.6, and 10K about 11.1 to 11.6, depending on the metals mixed in.
How to do it:
- Weigh the dry item in grams.
- Fill a narrow graduated cylinder partly with water and record the level in milliliters.
- Tie the item to a thread, lower it in so it’s fully submerged, and record the new level.
- Subtract the first level from the second to get the volume (1 mL equals 1 cm³).
- Divide weight by volume.
Example: a 10-gram ring raises the water by 0.65 mL. 10 ÷ 0.65 ≈ 15.4 g/cm³, consistent with 18K gold. Results close to one of the ranges above are a good sign; results far outside them are not.
For better precision, use the hydrostatic method: weigh the item dry, then weigh it while suspended in water. Divide the dry weight by the difference between the two readings.
Watch for errors:
- Air bubbles clinging to the item, so tap it to release them
- Gemstones, which change the result
- Hollow or filled pieces
- Tiny items, where small measuring errors matter a lot
The tungsten problem: tungsten’s density (about 19.25 g/cm 3) is almost identical to gold’s, so a gold-plated tungsten bar can pass this test. Always combine it with other checks, such as size and conductivity.
Scratch and Acid Tests
These tests are more telling than the earlier checks, but they leave tiny marks, so save them for pieces you’re comfortable testing.
The ceramic streak test
Drag the item firmly across an unglazed ceramic tile, such as the back of a bathroom tile. Real gold leaves a gold-colored streak, while base metals and many fakes leave a dark gray or black one. Streaks can be faint on small items, and the test may lightly scratch the surface.
Acid test kits
Most kits include a black touchstone, bottles of acid labeled for 10K, 14K, 18K and 22K, and instructions.
- Rub the item on the stone to leave a visible streak.
- Place one drop of 10K acid on the streak.
- If the streak stays, repeat on a fresh streak with the next strength up.
- The highest acid that leaves the streak intact indicates the karat.
Interpret results cautiously: a green or milky reaction points to base metal or silver, while no reaction suggests gold at or above that strength. Always test at least two spots.
Common mistakes and limits:
- Testing only the surface: thin plating can read as gold, so scratch through it in a hidden spot
- Using too faint a streak, which gives unclear reactions
- Testing white gold, where reactions are harder to read
- Using acid near pearls, opals or soft gemstones, which it can damage
Safety first: wear gloves and eye protection, work over a tray in a ventilated area, and rinse spills immediately. Follow the kit’s disposal instructions.
Like every test here, acid is one clue among several.
Testing Specific Items (Part 1): Jewelry, Coins and Bars
Different items hide different problems, so adapt your approach.
Jewelry
Test the main body of the piece, not just the clasp. Clasps, jump rings and solder joints are often made from a different, lower-karat metal, and earring posts and backs are frequently steel or plated. Chains are usually stamped on the clasp or a small tag, so check both.
Hollow chains and bangles give unreliable density results because trapped air makes the piece seem lighter for its size. For pieces with gemstones, avoid acid near the stones and be cautious with the density test, since stones add volume and mass. Test hidden spots first, such as the inside of a ring band or the back of a pendant, to keep visible surfaces unmarked.
Coins and bars
Counterfeit coins and bars can be sophisticated, so lean on several checks:
- Weight and dimensions: compare them with the mint’s or refiner’s official specifications
- Details: genuine pieces have sharp lettering, clean edges and correct mint marks; compare with images on the mint’s website
- Magnet slide test: tilt a strong magnet and slide the coin down its face. Gold slows because of eddy currents, so a coin that slides quickly is suspect.
- Ping test: listen for a clear, lasting ring and compare with a known genuine coin
A tungsten-filled bar can match gold’s density, so be extra careful with unmarked or oddly priced bars. For high-value bullion, buy from reputable dealers, keep sealed assay packaging intact, and consider professional testing such as ultrasound or XRF.
Testing Specific Items (Part 2): Dental Gold, Scrap and Raw Gold
Dental gold and scrap
Dental gold is rarely pure. Crowns and bridges are usually alloys of gold with platinum, palladium, silver or copper, and they often range from roughly 10K to 22K. Because those extra metals affect acid and conductivity readings, treat home results as rough estimates. Porcelain and other non-gold material add weight without adding value, so your weight-based estimates will run high.
For mixed scrap, sort pieces by color and stamp, weigh each group separately, and test a sample of every type. Never try to melt or refine scrap at home; the fumes and molten metal are hazardous, and you may destroy value. Ask a reputable buyer or assayer for a professional test on anything sizable.
Raw gold and nuggets vs. pyrite
Pyrite, “fool’s gold,” is the classic lookalike. Try these checks:
- Color: gold is a warm, buttery yellow that stays consistent when you tilt it. Pyrite looks brassy, with a pale or greenish tint and a glittery shine.
- Shape: pyrite often forms sharp cubes; gold usually appears as rounded, irregular nuggets or flakes.
- Malleability: press with a pin. Gold dents and flattens because it’s soft; pyrite is brittle and crumbles or chips.
- Streak: rubbed across unglazed porcelain, gold leaves a yellow streak, while pyrite leaves a greenish-black one.
- Weight: gold is about 19.3 g/cm 3, pyrite about 5, so gold feels far heavier for its size.
Mica flakes can also fool beginners, but they’re thin, layered and split apart easily. If a specimen fails several of these checks, it’s almost certainly not gold.
Myths and Bad Advice to Avoid
Search online and you’ll find plenty of “quick tricks” for spotting real gold. Many are unreliable, and some can damage your piece or even hurt you. Here are the biggest offenders.
The bite test. The idea is that gold is soft, so real gold should show teeth marks. But lead and other soft metals dent too, biting hard metals can chip your teeth, and you may mark the piece. It proves nothing.
The vinegar and lemon juice test. Supposedly, real gold won’t react to acid. In reality, vinegar and lemon juice are too weak to distinguish gold from many other metals, and a gold-plated item will pass just as easily.
The float test. Real gold sinks in water. Sinking tells you nothing, since brass, copper and steel sink too.
Toothpaste, baking soda and nail polish tricks. These have no scientific basis and can leave residue or scratches.
“Real gold never tarnishes.” Pure gold doesn’t, but lower-karat alloys contain copper and silver, which can tarnish or leave dark marks on skin. Skin marks also come from sweat and cosmetics, so a mark doesn’t prove a fake.
“If it’s heavy, it’s gold.” Lead and tungsten are heavy, too. Only measured density counts.
The flame test. Heating jewelry can damage it, release fumes and destroy value, and the results are meaningless.
Stick to the methods in this guide, and treat any single trick with suspicion. When in doubt, get a professional opinion rather than trusting a viral hack.
Putting It Together: A Testing Workflow
No single test settles the question, so work through them in order, from safest to most invasive.
- Check hallmarks and inspect visually. Note stamps, wear and color mismatches.
- Run the magnet test. A clear pull means it’s not solid gold, so stop.
- Weigh and measure coins and bars against official specifications.
- Do the density test and compare against karat ranges.
- Try a scratch or acid test in a hidden spot if you accept a small mark.
- Confirm valuable or unclear pieces with a professional.
If results conflict, lean on the more reliable method and look for an explanation. Plating or hollow construction often explains why density and acid results disagree.
Here’s how the tests compare:
| Test | Risk to item | Reliability | Best for |
| Hallmark | None | Low | First screening |
| Visual | None | Low | Spotting plating wear |
| Magnet | None | Low | Quick filtering |
| Weight and size | None | Medium | Coins and bars |
| Density | None | Medium-high | Loose, solid items |
| Acid test | Small mark | Medium-high | Estimating karat |
| Professional assay | Low | Very high | Final confirmation |
Use these decision rules:
- Clearly magnetic, or base metal showing through wear: not solid gold.
- Passes everything, with density in a karat range: likely genuine, but verify before buying or selling.
- Mixed results: treat the piece as unverified.
Keep notes on each result so you can spot patterns and share them with a professional. Take your time, and repeat any test that gives an unclear result. Photograph each step for your records. Remember: more agreeing tests mean more confidence.
When to Go Professional
Home tests are excellent for screening, but they have limits. They can’t pin down exact karat, see inside a piece, or reliably catch layered fakes such as gold-plated tungsten. Seek professional testing when a piece is valuable, when results conflict, or before a significant purchase or sale.
Professional methods
- XRF analysis: an X-ray fluorescence analyzer scans the item and reports its metal composition in seconds. It’s non-destructive, but it reads mostly the surface, so operators may test several spots.
- Fire assay: the most precise method. A small sample is melted and refined to measure gold content exactly. It’s destructive, slower and costlier, so it’s typically reserved for bullion, refining and disputes.
Where to go
- Reputable jewelers and coin or bullion dealers
- Independent, certified assayers or assay offices
- Grading services for collectible coins
What to expect
Fees vary: quick XRF checks are often cheap or free, while fire assay costs more and can take days. Ask which method they’ll use and request a written report for valuable items.
Before you go
Bring photos, notes from your home tests and any paperwork such as receipts or appraisals. Clean the item first, and ask if testing happens in front of you. Knowing your item’s approximate weight and karat helps you judge if an offer is fair. A little preparation makes the visit faster and safer.
Protect yourself
Get two or three opinions before selling, and never let your item out of sight during testing. Be wary of anyone who refuses to explain their method or pressures you to decide quickly.
What Is Your Gold Worth?
Once you know your item is genuine, you can estimate its melt value, which is what the metal alone is worth.
The formula:
Melt value = weight in grams × purity × (spot price per troy ounce ÷ 31.1035)
Here, purity is the karat fraction as a decimal: 24K = 0.999, 22K = 0.916, 18K = 0.750, 14K = 0.585, 10K = 0.417. The number 31.1035 is the grams in one troy ounce, which is how gold is priced. Check the current spot price from a reputable market source.
Worked example (using a hypothetical spot price of $3,000 per troy ounce):
- Price per gram: 3,000 ÷ 31.1035 ≈ $96.45
- Pure gold in a 10-gram 14K chain: 10 × 0.585 = 5.85 g
- Melt value: 5.85 × 96.45 ≈ $564
Real-world offers: Buyers usually pay less than melt value, since they cover refining costs and profit, so compare several quotes. Bullion coins and bars typically sell for a premium over spot, while antique, signed or collectible pieces can be worth more than their metal. Subtract the weight of gemstones or non-gold parts when you can.
Tips for a fair price:
- Ask buyers what percentage of spot or melt value they’re paying.
- Get quotes in writing and compare at least three.
- Watch the timing: spot prices move daily, so check again before you sell.
- Keep receipts, appraisals and certificates, which can support a higher price.
Remember that this is an estimate. Your buyer’s testing may show a slightly different purity than the stamp, which changes the result. Recalculate with the tested purity.
Buying Gold Safely and Avoiding Fakes
Testing skills also protect you as a buyer. Counterfeiters target people who are in a hurry or hoping for a bargain, so slow down and verify.
Red flags:
- Prices well below spot or typical retail
- Pressure to decide fast or pay by untraceable methods
- No return policy or refusal to let you test the item
- Bars missing the serial numbers or packaging the brand normally includes
- Blurry or stock photos and vague descriptions
- Sellers with no history, reviews or physical address
Buy from trusted sources: Government mints, established bullion dealers and reputable jewelers are the safest choices. Check reviews, memberships in trade associations and buy-back policies before ordering.
Verify before you pay:
- Ask for an invoice listing weight, purity and total price
- Compare the price against spot plus a typical premium
- Confirm hallmarks and serial numbers in close-up photos
- Prefer payment methods that offer dispute protection
- For jewelry, get karat, construction (solid, filled or plated) and return terms in writing
Test on arrival: Weigh, measure and run the non-destructive checks as soon as it arrives, while the return window is open. Document the unboxing with photos or video, especially for high-value purchases, and insure shipments.
Online marketplaces and private sales: Use platforms with buyer protection, keep communication on the platform, and meet in a secure place such as a dealer’s shop for in-person deals. If a story sounds too good, walk away. A legitimate seller will never mind you taking your time or verifying the item.
Legal and Practical Considerations
Owning, buying and selling gold comes with rules that vary by country and even by region, so check your local requirements. This section is general information, not legal or tax advice.
Hallmarking rules: Some countries require gold articles above a minimum weight to be hallmarked by an official assay office, as in the UK. Others only regulate how items can be marked and sold. Either way, unofficial stamps alone are not proof of purity.
Identification and records: Reputable dealers and pawnshops often record your ID and transaction details, partly to deter stolen goods and money laundering. Large transactions may trigger reporting requirements. Keep your own records of receipts, weights and test results.
Taxes: Tax treatment varies. Some places charge sales tax or VAT on gold purchases, while selling at a profit can create a taxable gain. Ask a tax professional before large transactions.
Insurance and appraisals: For valuable pieces, get a written appraisal. Insurance appraisals estimate replacement cost, which is usually higher than melt value. Standard home insurance policies often cap jewelry coverage, so check your limits and consider extra coverage. Photograph each piece and store records separately from the items.
Moving gold across borders: Carrying or shipping gold internationally may require customs declarations. Rules on limits and paperwork differ, so check before you travel or ship, and insure shipments.
Secure storage: Use a home safe or bank safe deposit box, and avoid discussing your holdings publicly. Consider telling only trusted family members where valuables are kept.
Caring for and Storing Your Gold
Gold is durable, but it’s also soft, so good habits keep it looking its best and protect its value.
Cleaning jewelry
- Soak in warm water with a few drops of mild dish soap for 15 to 20 minutes
- Brush gently with a soft toothbrush, paying attention to crevices
- Rinse in clean water and pat dry with a soft, lint-free cloth
- Avoid chlorine bleach, harsh abrasives and toothpaste, which can damage alloys or scratch the surface
Be extra gentle with gold-plated items, since rubbing can wear the coating away. Use ultrasonic cleaners cautiously, and avoid them for pieces with delicate stones or hollow construction.
Storing jewelry
- Keep each piece in its own soft pouch or a lined compartment to prevent scratches
- Store in a cool, dry place, away from humidity
- Fasten chains to prevent tangling
- Add anti-tarnish strips for lower-karat pieces that darken over time
Everyday wear
Put jewelry on last, after makeup, perfume and lotion, and remove it before swimming, cleaning or exercising. Chlorine, salt water and household chemicals can harm gold alloys.
Coins and bullion
Keep them in their original capsules or sealed packaging, and handle them by the edges. Don’t clean collectible coins, since cleaning can reduce their value.
Regular checkups
Have a jeweler inspect clasps, prongs and settings about once a year to prevent loss. Ask them to check for thinning metal, loose stones and worn spots. Early repairs usually cost far less than replacing a lost piece.
Simple care keeps gold looking new for decades.
Frequently Asked Questions
Can gold-plated items pass a magnet test?
Yes. Gold plating over a non-magnetic base such as brass or copper won’t react to a magnet, so passing proves little. Plating over steel or nickel may stick, though. Combine the magnet test with density and acid tests.
Does real gold float or sink in water?
Real gold sinks, but so do most metals, so sinking proves nothing. Gold’s density is about 19.3 g/cm³, and measuring it properly is far more informative.
Can I test gold with just a magnet and vinegar?
Not reliably. A magnet only rules out magnetic fakes, and vinegar is too weak to tell gold from many other metals. Use density and a proper acid kit, and confirm valuable items with a professional.
How can I tell 14K from 18K at home?
Check stamps first: 585 means 14K and 750 means 18K. Then compare density, since 18K is noticeably denser, and use an acid kit’s karat strengths to confirm.
Is the acid test safe for my jewelry?
Usually, when done carefully, it leaves a tiny mark and can damage soft gemstones such as pearls and opals. Avoid it on antiques and designer pieces, wear gloves and eye protection, and test a hidden spot.
What if my gold tests real but the buyer says it’s fake?
Ask what test they used, then get a second opinion, ideally XRF from an independent, reputable assayer or jeweler. Misread tests, low-karat alloys or hidden plating can explain differences. Don’t sell until you understand the result.
Conclusion
Testing gold at home is about building evidence, not chasing a single magic answer. Start with the safe checks: hallmarks, a close visual inspection and a magnet. Add a density test for stronger clues, and use scratch or acid tests carefully when you’re comfortable with a small mark. Steer clear of myths like the bite and vinegar tests, and remember that plating, tungsten and hollow construction can fool even good methods.
When a piece is valuable, results conflict or money is about to change hands, get a professional XRF or assay. It’s usually a small price compared with the cost of a mistake.
Above all, patience pays off: take your time, document your results, and never rush a sale. Happy testing!
Found this guide helpful? Share it with someone sorting through inherited jewelry, subscribe for more practical guides, or leave a comment with your own gold-testing question.

I am Jaxon Blake, the author of DreamZoons.com, where I explore the hidden meanings behind dreams. I am a dream expert, and I help people understand what their dreams may be trying to tell them.