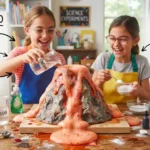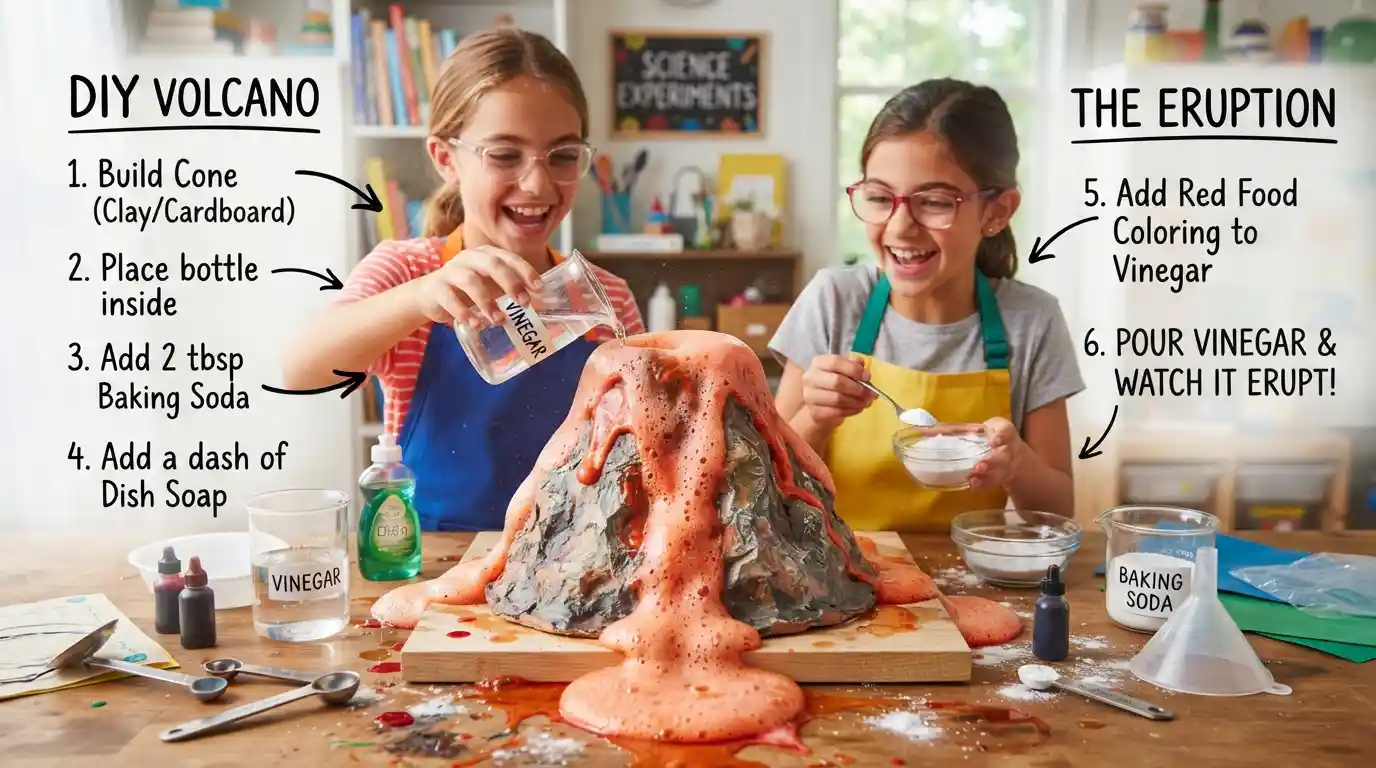
To make a simple volcano, place a small plastic cup or bottle on a tray, surround it with clay or paper to form a mountain, and leave the opening exposed. Add baking soda, dish soap, and food coloring inside. When you pour in vinegar, the ingredients react and create bubbly foam that flows out like lava.
Key Takeaways
- Baking soda and vinegar create the bubbling eruption.
- Dish soap makes the foam thicker and longer-lasting.
- Food coloring gives the eruption a lava-like appearance.
- Clay, play dough, or papier-mâché can create the volcano shape.
- The experiment models an eruption; it does not reproduce a real volcanic eruption.
What You Need to Make a Volcano
You do not need expensive science equipment to make a volcano. Most of the materials are easy to find at home or in a classroom.
Materials for the Volcano Model
Gather:
- Small plastic bottle or paper cup
- Cardboard, tray, or baking sheet
- Clay, play dough, or papier-mâché
- Tape
- Paper or newspaper
- Paint and paintbrushes, if desired
A small bottle or cup works as the volcano’s inner chamber. The clay or paper structure creates the mountain around it. NASA’s volcano activity uses a paper cup, cardboard, play dough, baking soda, and vinegar for a simple educational model.
Ingredients for the Eruption
For a simple eruption, use:
- 2–3 tablespoons baking soda
- About ½ cup white vinegar
- 1 teaspoon liquid dish soap
- A few drops of red or orange food coloring
You can adjust the amounts depending on the size of your container. Several educational volcano activities use baking soda and vinegar as the main ingredients, while dish soap and food coloring help create a thicker and more colorful foam.
How to Make a Volcano Step by Step
1. Build the Volcano Base
Start by placing your small plastic bottle or cup in the center of a sturdy tray or piece of cardboard.
Secure it with tape if it moves easily. The tray is important because the eruption can spread beyond the sides of your model.
For an especially easy setup, you can skip the large mountain and simply place the container inside a shallow tray. You can still perform the science experiment without making a detailed volcano shape.
2. Create the Mountain Shape
Now build the outside of your volcano.
Shape clay or play dough around the container. Leave the opening at the top completely uncovered. You want the finished model to look like a small mountain with a crater.
If you prefer papier-mâché, build a cone around the bottle using newspaper and glue. Let the structure dry before painting it. A paper volcano can take much longer to prepare than a clay version, so plan ahead if this is for a school project.
Paint the mountain brown, gray, or another natural color. You can also add green areas, rocks, trees, or painted lava trails.
The goal is not to make the model perfect. The opening must simply remain clear so the foam can escape.
3. Prepare the Eruption Mixture
Put 2–3 tablespoons of baking soda into the bottle or cup.
Next, add about one teaspoon of dish soap. The soap does not create the chemical reaction. Instead, it helps trap the gas bubbles and creates more visible foam.
Add a few drops of red or orange food coloring. This gives the foam a lava-like appearance.
Do not add the vinegar yet.
Keeping the vinegar separate lets you choose exactly when the eruption begins.
4. Make the Volcano Erupt
Place your volcano on a tray or another easy-to-clean surface.
When everyone is ready, slowly pour about ½ cup of white vinegar into the opening.
Step back and watch.
The mixture should quickly fizz, foam, and flow over the top of the volcano. The colored foam looks similar to lava moving down the sides of a volcanic mountain.
The eruption is caused by the reaction between the baking soda and vinegar. Educational resources from NASA and the Natural History Museum use this same basic reaction for volcano models.
5. Observe the Results
A science project becomes more useful when you observe what happens instead of simply watching the eruption.
Ask questions such as:
- How quickly did the eruption begin?
- How far did the foam travel?
- Did more baking soda change the result?
- What happened when you used more or less vinegar?
- Did dish soap make the foam last longer?
Write down your observations if you are completing this as a school experiment.
Why Does a Baking Soda Volcano Erupt?
The eruption happens because baking soda and vinegar undergo a chemical reaction.
Baking soda is sodium bicarbonate, while vinegar contains acetic acid. When they mix, they produce carbon dioxide gas along with water and dissolved substances.
The carbon dioxide forms bubbles quickly. Those bubbles push the liquid upward and create the familiar fizzing and foaming effect.
In simple terms:
Baking soda + vinegar → carbon dioxide bubbles + water + other products
The dish soap catches some of those bubbles, making the eruption look thicker and foamier.
How This Differs From a Real Volcano
A baking soda volcano is a model, not a miniature version of the exact process inside Earth.
Real volcanic eruptions involve molten rock, gases, pressure, magma, and geological processes beneath Earth’s surface. The National Park Service specifically notes that the baking soda-and-vinegar demonstration differs from real volcanic eruptions because its carbon dioxide comes from a chemical reaction.
That difference actually makes the experiment useful. It gives students an easy way to observe gas formation and fluid movement while learning about volcanoes.
How to Make a Volcano for a School Project
If you need a volcano for a science fair or classroom project, spend some time on both the model and the science.
A sturdy cardboard base can keep the project stable. Place a small bottle in the center and build a mountain around it using clay, play dough, or papier-mâché.
You can label important parts such as:
- Crater
- Vent
- Magma chamber
- Lava
- Volcano cone
For a more advanced project, record how different amounts of baking soda and vinegar affect the eruption. NASA’s educational activities even use repeated lava flows and mapping to help students study how volcanic layers can form.
If your teacher requires a hypothesis, you could write:
“If I increase the amount of baking soda, then the eruption will produce more foam because more reactant will be available to react with the vinegar.”
Then test your idea rather than simply assuming it is correct.
How to Make the Eruption Bigger and Foamier
Want a more dramatic eruption? Try changing one variable at a time.
For example, test:
- More or less baking soda
- More or less vinegar
- Different amounts of dish soap
- Different container sizes
- Different food coloring combinations
Dish soap can make the foam more noticeable, but adding more of everything does not automatically produce a better experiment.
For a school project, controlled testing is more valuable than simply making the biggest mess.
Also, never seal the bottle or container after combining the ingredients. The reaction produces gas, and a sealed container can allow pressure to build. Keep the opening exposed throughout the experiment.
Common Mistakes to Avoid
Using a container that is too small:
The foam may overflow immediately. Use a tray underneath your model.
Adding vinegar too early:
Wait until everyone is ready to observe the eruption.
Covering the bottle opening:
Always leave the opening open. Never seal the reacting mixture.
Using too much water:
Extra water can dilute the ingredients and change the appearance of the eruption.
Making the mountain too narrow:
Leave enough space around the opening for the foam to flow outward.
Forgetting the cleanup area:
Food coloring can stain some surfaces and fabrics, so use a washable tray or conduct the experiment outdoors.
Safety and Cleanup Tips
This is a simple demonstration, but basic safety still matters.
Wear eye protection if your teacher or activity instructions require it, and avoid getting the mixture in your eyes. Work in a well-ventilated area and keep the volcano on a stable, wipe-clean surface. The Natural History Museum also recommends standing back from the eruption and using a wipe-clean surface for easier cleanup.
Never drink or taste the ingredients during the experiment.
After the eruption finishes, wipe up the foam and rinse the equipment with water. If you use food coloring, clean spills promptly to reduce the chance of staining.
Simple Volcano Experiments to Try
Once you know how to make a volcano, you can turn the activity into a real investigation.
Test 1: Does baking soda change the eruption?
Use the same amount of vinegar but change the amount of baking soda.
Test 2: Does vinegar amount matter?
Keep the baking soda amount the same and test different amounts of vinegar.
Test 3: Does dish soap affect the foam?
Compare an eruption with soap to one without it.
Test 4: Which color looks most like lava?
Try red, orange, or a combination of colors.
Test 5: How far does the foam travel?
Measure the distance from the crater to the end of the flow.
These variations turn a fun demonstration into a simple science investigation involving predictions, measurements, observations, and conclusions.
Frequently Asked Questions
How much baking soda and vinegar do you need for a volcano?
A good starting point is about 2–3 tablespoons of baking soda and ½ cup of white vinegar for a small model. The exact amount depends on the size of your container. Start with a modest quantity and adjust it during later trials.
Can you make a volcano without vinegar?
Yes. You can create other types of volcano demonstrations using different acids, but vinegar is popular because it is inexpensive and easy to find. For a basic home or school project, baking soda and white vinegar provide a simple, familiar reaction.
Is a baking soda volcano a real volcanic eruption?
No. It is a science model that demonstrates bubbling, gas formation, and flowing foam. Real volcanoes erupt through complex geological processes involving magma, pressure, and volcanic gases. The National Park Service explains that the baking soda-and-vinegar reaction differs significantly from the processes behind actual volcanic eruptions.
Conclusion
Learning how to make a volcano is a simple way to turn science into a hands-on activity. With baking soda, vinegar, dish soap, food coloring, and a basic mountain-shaped model, you can create a fun eruption in just a few minutes.
More importantly, the experiment gives you something to investigate. You can change the ingredients, make predictions, measure the results, and explain why carbon dioxide bubbles create the foamy eruption.
For a school project, focus on the science as much as the appearance. A creative volcano looks great, but understanding the chemical reaction behind it makes the project much more meaningful.

I am Jaxon Blake, the author of DreamZoons.com, where I explore the hidden meanings behind dreams. I am a dream expert, and I help people understand what their dreams may be trying to tell them.